
Newton Print are your proactive packaging partner, delivering sustainable, thoughtful solutions to keep your food production future-proofed and flowing profitably. We love to think outside the box rather than just be typical printers and we realise that printed packaging can be confusing.
So, we’ve put together a list of printing terminology and definitions you may come across to help you understand the printing jargon.
Technical Printing Terms for Packaging and Printing
Artwork versions
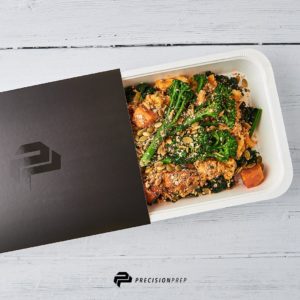
An artwork version is where there is more than one design for the same packaging size. For example, you may have a range of ready meals that use the same size tray and therefore require the same size sleeve but the meals inside are different so you need different artwork versions for each product.
Bleed
A bleed is the area where the print runs to the cut edge of the packaging. Standard requirement a minimum 3mm bleed. This is essentially an overlap of the artwork and it means that if there is any small variance in the printing or cutting position, there won’t be any white edges showing.
Carbon balanced printing
We are now certified as one of just a handful of Carbon Balanced Printers, having measured and offset our operational carbon footprint with the World Land Trust. This means we can offer our clients Carbon Balanced paper and printed materials, where both the paper/board and the printing operational impacts have been offset.
CMYK
CMYK stands for Cyan, Magenta, Yellow and Key (Black). These are the four colours used in printing where they are added to the surface of the board using dots of ink to make up an image.
Die cut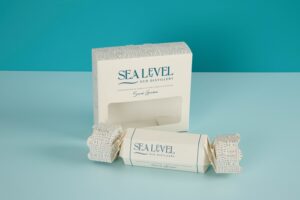
Die cutting is the process of creating unique shapes and is used to cut a flat sheet into the required shape and format ready to be turned into your packaging by using a cutting tool. This process requires a customised die (also called tooling) to create the shape. You’ll need to have us create the cutter guide template first, which is then used to create the tooling. The tooling is used almost like a stamp-cutter to push out the shape from a flat sheet of board. This is also the method used to create windows or apertures in packaging.
Die lines
In its flattened form, die lines refer to the fold, cut and perforation lines that are marked on the template of the final package. When your design is printed, the die lines indicate where the machine needs to cut and score the board so your packaging is ready for folding.
Digital printing
Digital printing is when a digital-based image is printed directly onto the board using toner-based printing presses. It’s commonly used by us for printing pre-production samples in very small volumes. We don’t use digital printing for production runs, as our unique litho printing process allows us to produce packaging from small to large volumes.
False Crease
A false crease is an extra crease that has been added to your packaging (especially food tray sleeves) which allows your sleeve or packaging to fold flat when it is being packaged for shipment. Without the false crease the sleeves would not fold flat and would need to use considerably more boxes to package before shipping them to you.
 Fold lines
Fold lines are the lines where the packaging will be folded to ensure that everything is in the right place. These lines are only visible during the design process and on the proof images, they will not be printed on the final product.
Glue Tab
Glue tabs are areas on a packaging template where glue will be applied to the packaging after production to create the final shape. These tabs are scored and folded to join together sections of the packaging. For example, there is often a glue tab running down the side of a box to join the two sides together. If there are no glue tabs, the packaging boxes must be joined using tape.
GSM
GSM stands for ‘grams per square metre’ and refers to the weight of paper. It is not the same as microns (or ‘mic’) which is what we tend to use to grade packaging boards.
Lithographic printing
Lithographic printing (also known as offset or offset litho printing) is the process whereby digital artwork is transferred to a substrate (in our case, carton board) using plates. The process begins with converting the original artwork to the four colour profiles within CMYK, as well as any special Pantone colours. Each individual colour profile is then applied to an aluminium printing plate by laser etching.
The plates (one for each colour) are mounted to rollers on the press which are also connected to the ink ducts and the ink is transferred to the correct areas on the board as it goes through. That’s litho print in a nutshell!
Pantone colours
Pantone is a universal colour language that ensures the right colour is achieved every time. Printing with spot colours (Pantone inks) is the best way to accurately and consistently reproduce your brand colours and in some cases, there is just no alternative.
Perforation line
The perforation line is a line of small holes punched into printing media to make it easy to rip one part of the printed material from another section.
Proofing
A print proof is a prototype that will show you how the final print will look, usually supplied in PDF format but sometimes as a printed ‘wet’ proof.
RGB
RGB stands for Red, Green and Blue and refers to the colours used on a digital display screen. It’s not used for printing so we have to convert everything to a CMYK colour profile instead.
Safe zone
We always advise to ensure there is a ‘safe zone’ of at least 5mm inside your trim lines, where you need to keep all text and important graphics 5mm away from the trim edge. This will ensure that any important information your packaging needs to contain won’t be affected during variances in the trimming process.
Trim marks
Trim marks are the lines put onto the design pages to show where the packaging will be trimmed.
Uncoated paper
We’re often asked “What’s the difference between uncoated and coated paper?” Uncoated paper is produced with no coating at all. This means that the surface of the paper is made up of just the raw, exposed wood fibres (this gives it the slightly textured feel, especially in the less refined processes which produce standard or rough papers). It is commonly used in packaging where we use the uncoated side of the carton board
Vector images
A vector image is an image that can be scaled and changed whilst retaining the image resolution.
Printing Embellishment Terms
Coatings
Machine coating is similar in essence to a varnish – it’s applied inline (ie on the litho printing press) after the ink is laid on the paper. This is the reason it’s far less costly than lamination because it doesn’t involve a secondary process. It’s an oil-based substance that coats the entire surface of the paper to protect the ink from scuffing or transferring. This is why inline coating is much more friendly to both the environment and the wallet when compared to lamination.
 Debossing
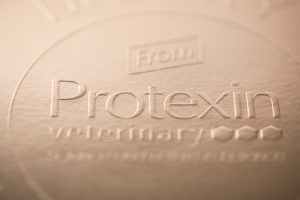
Where an emboss is raised up from the surface, a deboss is pressed down into the surface to make it sink slightly lower.
Embossing
Embossing works in a similar way to foil blocking, except that the die is stamped a bit harder and there is no foil involved. The die is stamped onto the sheet from either behind to create the impression for embossing (which is raised from the surface) or from the front if debossing (which creates an indentation in the surface).
Foiling
Foil blocking is a unique process that uses a moulded metal die which is stamped onto the board, with an ultra-thin sheet of metal foil in between. This transfers the metal foil to the board in the shape of the die.
Lamination
Laminating is essentially an ultra-thin sheet of plastic that is heat-sealed to the surface of the board once it’s printed. This has the effect of protecting the print from water droplets, scratches etc. However, as it is plastic it isn’t the most environmentally-friendly option.
 Spot UV
To create this effect, the gloss varnish is applied to a printed sheet in an area that has been pre-specified with a piece of artwork which is then converted to a film. This varnished area is then placed under a UV lamp to cure it so that it dries instantly.
It can be defined as very fine lines but don’t go too thin (below 0.5mm) for critical areas, as the varnish may not be able to hold.
How we can help you
If you are looking to create impactful and eco-friendly printed packaging or you need help understanding print, please get in touch with us to find out how we can help.
YOU MIGHT ALSO LIKE

VARIPAK PACKAGING
Our Varipak retail packaging range has been created to help food, drinks and FMCG brands get their products ready for retail fast.
DISCOVER MORE